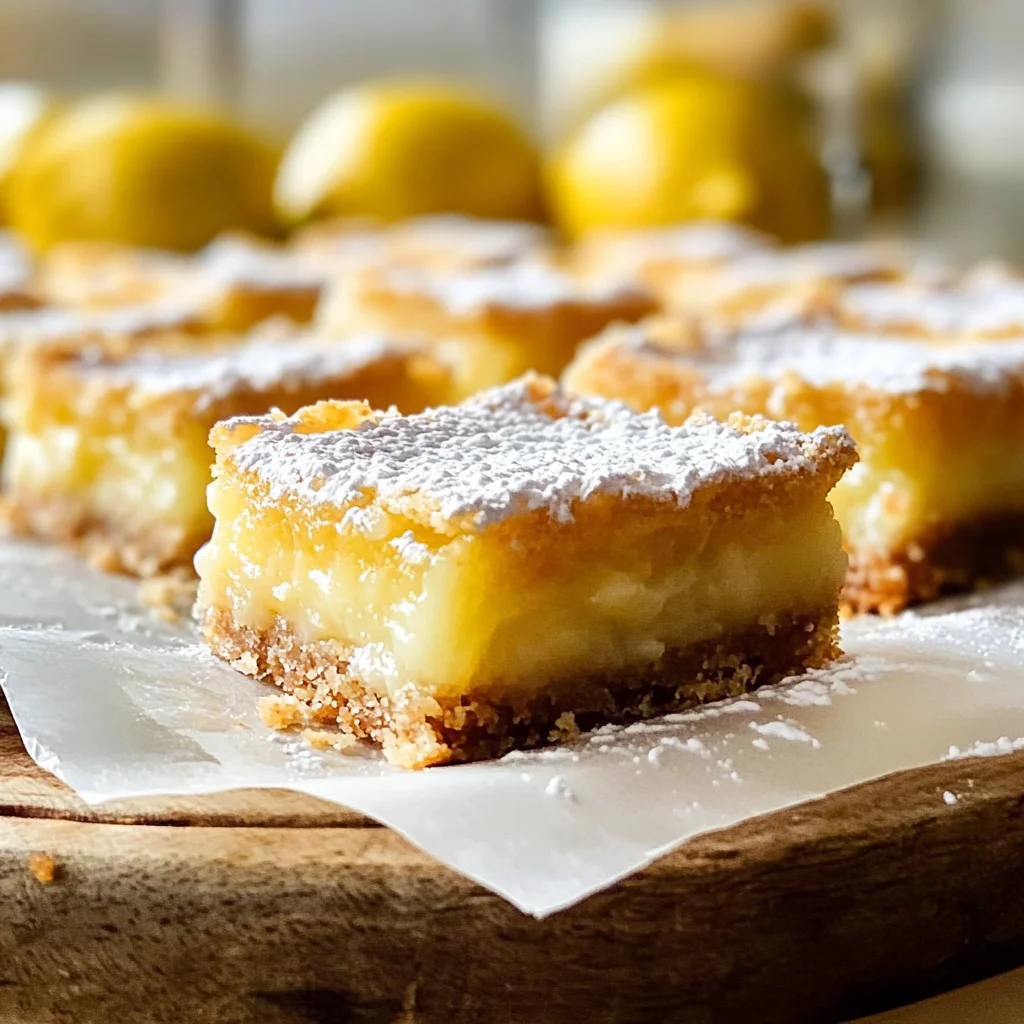
Lemon Bars
Lemon Bars are a delightful treat perfect for any occasion. These tangy and sweet bars offer a burst of flavor that’s refreshing and satisfying. Whether you’re hosting a summer picnic, celebrating a birthday, or just indulging in a weekend dessert, these Lemon Bars will impress. Their creamy texture and zesty lemon flavor make them stand out from the typical dessert crowd.
Why You’ll Love This Recipe
- Easy to Make: This recipe requires minimal steps and simple ingredients, making it accessible for all skill levels.
- Perfectly Balanced Flavors: The combination of tart lemon juice and sweet honey creates a harmonious taste that will keep you coming back for more.
- Versatile Dessert: Enjoy Lemon Bars chilled or at room temperature, making them suitable for any season or occasion.
- Healthier Option: Using honey instead of refined sugar gives these Lemon Bars a natural sweetness without sacrificing flavor.
- Customizable Recipe: Feel free to experiment by adding your favorite toppings like fresh berries or whipped cream.
Tools and Preparation
To create the perfect Lemon Bars, having the right tools can make all the difference. Here’s what you’ll need to get started.
Essential Tools and Equipment
- Mixing bowl
- Whisk
- Baking dish (8×8 inches)
- Measuring cups and spoons
- Zester or grater
Importance of Each Tool
- Mixing bowl: A large mixing bowl allows you to combine ingredients thoroughly without making a mess.
- Whisk: This tool is essential for blending eggs and other liquids smoothly, ensuring even texture in your Lemon Bars.
- Baking dish: An 8×8 inch baking dish is ideal for creating that perfect thickness in your bars, providing an even bake.
Ingredients
For the Crust
- 1/2 cup (113 grams) unsalted butter
- 1/2 cup (100 grams) granulated sugar
- 1 cup (92 grams) rolled oats
- 1/4 cup (31 grams) all-purpose flour or whole wheat pastry flour
For the Filling
- 4 large (50 grams each, out of shell) eggs
- 1/2 cup (160 grams) honey
- 1 tablespoon lemon zest
- 1/2 cup (120 ml) freshly squeezed lemon juice
- 1/4 cup (31 grams) all-purpose flour
How to Make Lemon Bars
Step 1: Prepare the Crust
- Preheat your oven to 350°F (175°C).
- In a mixing bowl, combine the unsalted butter, granulated sugar, rolled oats, and flour.
- Mix until crumbly and press into the bottom of an 8×8 inch baking dish.
- Bake for 15 minutes or until golden brown.
Step 2: Make the Filling
- In another bowl, whisk together the eggs, honey, lemon zest, and lemon juice.
- Gradually add in the remaining all-purpose flour, mixing until smooth.
Step 3: Combine Layers
- Pour the filling over the pre-baked crust in the baking dish.
- Return to the oven and bake for an additional 20-25 minutes until set.
Step 4: Cool and Serve
- Allow your Lemon Bars to cool completely in the pan.
- Once cooled, cut into squares and dust with powdered sugar if desired.
Enjoy your homemade Lemon Bars as a refreshing dessert that everyone will love!
How to Serve Lemon Bars
Lemon bars are a delightful treat that can be enjoyed in various ways. Whether you are serving them at a gathering or simply enjoying them at home, here are some creative serving suggestions.
With Fresh Berries
- Serve lemon bars with a side of fresh strawberries, blueberries, or raspberries for a burst of flavor and color.
Dust with Powdered Sugar
- A light dusting of powdered sugar adds an elegant touch and balances the tartness of the lemon bars.
Accompanied by Whipped Cream
- A dollop of whipped cream complements the tangy lemon flavor and adds a creamy texture.
With a Scoop of Sorbet
- Pair your lemon bars with a refreshing scoop of lemon or berry sorbet for an extra layer of flavor.
As Part of a Dessert Platter
- Include lemon bars on a dessert platter alongside other treats like cookies and brownies for variety.
How to Perfect Lemon Bars
Creating the perfect lemon bars requires attention to detail. Here are some essential tips to help you achieve that ideal balance of tart and sweet.
- Use Fresh Ingredients: Always opt for fresh lemons and high-quality eggs to enhance the flavor.
- Chill Before Serving: Allow the lemon bars to cool completely, then refrigerate them for a few hours before cutting. This helps them set properly.
- Monitor Baking Time: Keep an eye on your baking time to prevent overcooking. The edges should be firm, while the center remains slightly jiggly.
- Zest Carefully: Use only the yellow part of the lemon peel when zesting. Avoid bitter white pith for the best flavor.
- Experiment with Sweetness: Adjust honey to your taste preference, especially if you prefer a sweeter bar.
Best Side Dishes for Lemon Bars
Lemon bars can shine even brighter when paired with complementary side dishes. Here are some excellent options to consider serving alongside them.
- Mint Tea: A refreshing mint tea pairs well with lemon bars, offering a herbal note that balances their sweetness.
- Fruit Salad: A colorful fruit salad enhances the citrus flavors and provides additional textures.
- Cheese Platter: A selection of mild cheeses can provide a savory contrast to the tangy sweetness of lemon bars.
- Coconut Macaroons: These chewy treats add another layer of flavor and texture that complements lemon beautifully.
- Chocolate-Covered Strawberries: The rich chocolate contrasts nicely with the tartness of lemon bars, making for an indulgent pairing.
- Vanilla Ice Cream: Classic vanilla ice cream is always a hit, providing creaminess that balances the tartness of lemon bars.
Enjoy making your delicious Lemon Bars and serving them in delightful ways!
Common Mistakes to Avoid
When making Lemon Bars, it’s easy to overlook a few critical steps. Here are some common mistakes to avoid:
- Incorrect Measurements: Always measure your ingredients accurately. Using too much or too little can affect texture and flavor.
- Not Zesting Properly: Ensure you zest the lemons correctly. Avoid the white pith, as it can make the bars bitter.
- Overbaking: Keep an eye on your bars while baking. Overbaking can lead to a dry texture instead of the desired creamy finish.
- Skipping Cooling Time: Allow your Lemon Bars to cool completely before slicing. This helps them set properly and makes cutting easier.
- Using Bottled Juice: Freshly squeezed lemon juice is essential for the best flavor. Bottled juice often lacks the brightness that fresh lemons provide.
Storage & Reheating Instructions
Refrigerator Storage
- Store Lemon Bars in an airtight container.
- They will keep well for up to one week in the refrigerator.
Freezing Lemon Bars
- Wrap individual bars tightly in plastic wrap or foil.
- Place them in a freezer-safe container; they can be frozen for up to three months.
Reheating Lemon Bars
- Oven: Preheat the oven to 350°F (175°C). Place bars on a baking sheet and warm for about 10-15 minutes.
- Microwave: Heat individual bars on medium power for 20-30 seconds until just warm.
- Stovetop: Use a skillet over low heat, placing a bar inside for a few minutes until warmed through.
Frequently Asked Questions
How To Make Lemon Bars Without Eggs?
You can substitute eggs with flaxseed meal mixed with water or use silken tofu blended until smooth as an egg replacement.
Can I Use Whole Wheat Flour in My Lemon Bars?
Yes, you can replace all-purpose flour with whole wheat pastry flour for a nuttier flavor and added nutrition.
What Are Microwave Lemon Bars?
Microwave Lemon Bars are a quick version made using a microwave. They require less time and can be cooked in just a few minutes!
How To Make Oatmeal Lemon Bars?
To make Oatmeal Lemon Bars, simply add oats into the crust mixture. This gives a delightful texture and additional fiber.
How To Make Lemon Curd Bars?
Lemon Curd Bars are made by creating a thick lemon curd filling using eggs, sugar, and lemon juice poured into a pre-baked crust.
Final Thoughts
These Lemon Bars are not only refreshing but also incredibly versatile! You can customize them with different citrus flavors or add toppings like coconut or berries. Try this recipe today and enjoy its delightful tartness!
Lemon Bars

Lemon Bars are a delightful combination of tangy and sweet flavors, making them an irresistible treat for any occasion. With a buttery oat crust and a creamy lemon filling, these bars offer a refreshing burst of citrus that is perfect for summer picnics, birthdays, or simply indulging at home. The natural sweetness from honey enhances the flavor without overpowering the zesty lemon, creating a perfectly balanced dessert. Easy to prepare and customizable with various toppings like fresh berries or coconut, these Lemon Bars will impress guests and satisfy your sweet tooth.
- Prep Time: 15 minutes
- Cook Time: 40 minutes
- Total Time: 55 minutes
- Yield: Approximately 9 servings 1x
- Category: Dessert
- Method: Baking
- Cuisine: American
Ingredients
- 1/2 cup unsalted butter
- 1/2 cup granulated sugar
- 1 cup rolled oats
- 1/4 cup all-purpose flour
- 4 large eggs
- 1/2 cup honey
- 1 tablespoon lemon zest
- 1/2 cup freshly squeezed lemon juice
- 1/4 cup all-purpose flour
Instructions
- Preheat oven to 350°F (175°C). In a mixing bowl, combine butter, sugar, oats, and flour until crumbly. Press into an 8×8 inch baking dish and bake for 15 minutes until golden brown.
- Whisk together eggs, honey, lemon zest, and lemon juice in another bowl. Gradually mix in remaining flour until smooth.
- Pour the filling over the pre-baked crust and return to the oven for an additional 20-25 minutes until set.
- Allow to cool completely before slicing into squares.
Nutrition
- Serving Size: 1 serving
- Calories: 180
- Sugar: 12g
- Sodium: 35mg
- Fat: 8g
- Saturated Fat: 5g
- Unsaturated Fat: 3g
- Trans Fat: 0g
- Carbohydrates: 24g
- Fiber: 1g
- Protein: 3g
- Cholesterol: 80mg