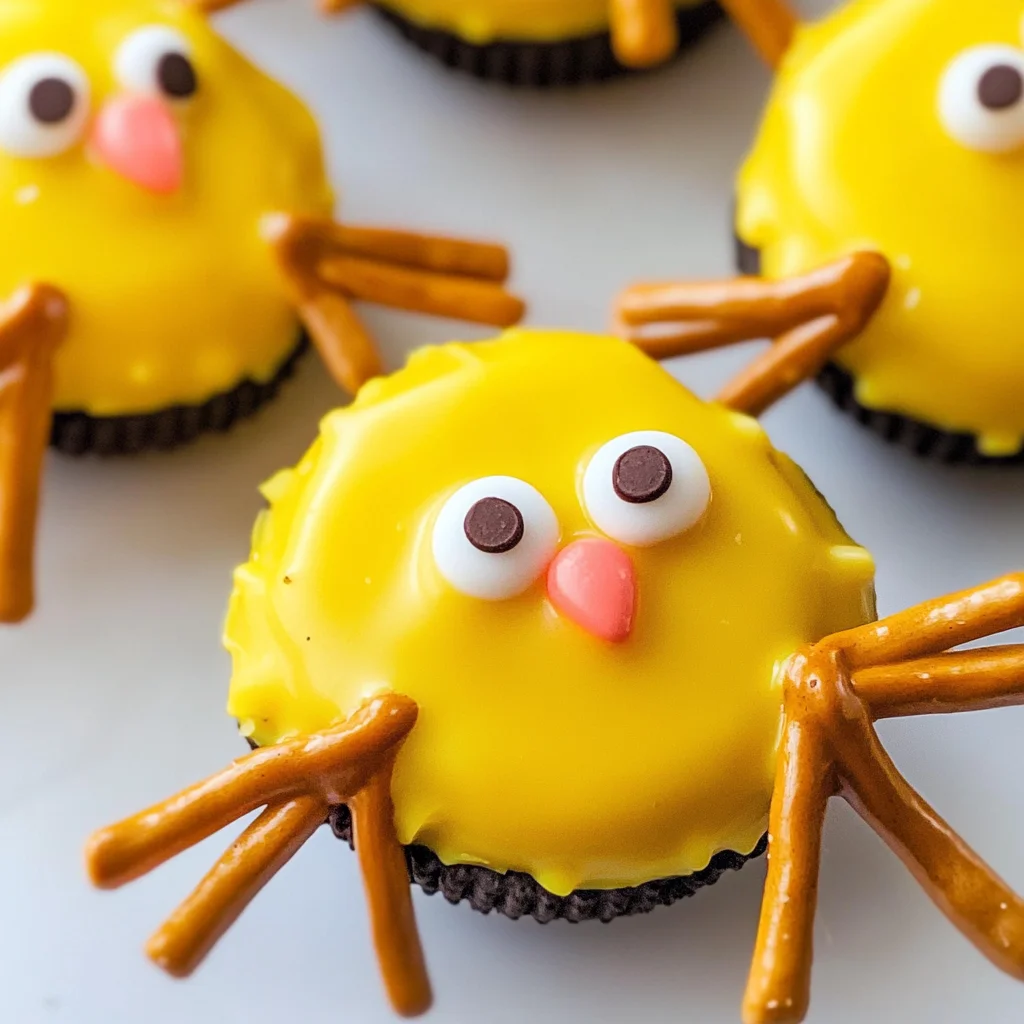
Oreo Easter Chicks
Oreo Easter Chicks are a delightful and creative way to celebrate the Easter season. These fun treats not only look adorable but are also incredibly easy to make. Perfect for parties, family gatherings, or simply as a festive snack, Oreo Easter Chicks combine the rich flavor of Oreos with the bright colors of candy melts. With their charming appearance and delicious taste, these treats are sure to be a hit with both kids and adults alike!
Why You’ll Love This Recipe
- Easy to Make: The steps are simple and require minimal prep time, making it perfect for all skill levels.
- Fun for Everyone: Kids will love helping out in the kitchen, making it a great family activity.
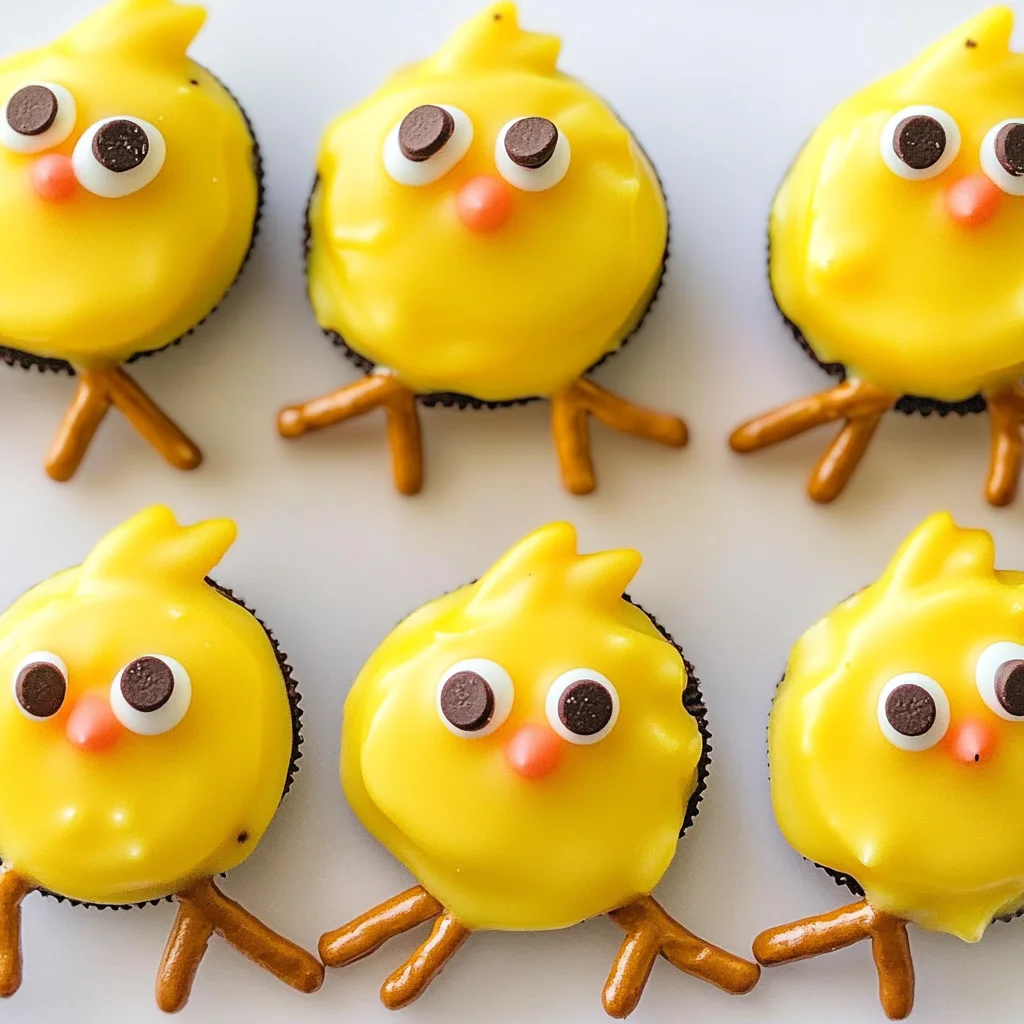
- Colorful Presentation: The vibrant yellow candy melt coating makes these chicks visually appealing for any occasion.
- Customizable: You can easily adapt these treats by adding different colors or decorations to match your theme.
- Perfect for Sharing: With 36 servings, you’ll have plenty to share at gatherings or events.
Tools and Preparation
Gathering the right tools will make your preparation process smoother. Here’s what you’ll need to get started.
Essential Tools and Equipment
- Baking sheet
- Wax paper
- Microwave-safe bowl
- Spoon or dipping tool
Importance of Each Tool
- Baking sheet: Provides a flat surface to cool your dipped Oreos while preventing them from sticking.
- Wax paper: Keeps your treats from sticking to surfaces, allowing for easy removal after they set.
- Microwave-safe bowl: Ensures safe melting of candy melts without worrying about damaging the container.
Ingredients
Oreo Easter Chicks are a super fun way to turn oreo cookies into a delicious Easter treat using yellow candy melts and pretzel sticks.
For the Chick Coating
- 1-2 bags yellow candy melts
For the Base
- 1 package double-stuff oreos
For Decoration
- Mini chocolate chips
- Thin pretzel rods (broken into short pieces)
- Orange decorating gel or orange candy melts
How to Make Oreo Easter Chicks
Step 1: Melt the Candy Melts
- Melt yellow candy melts according to package directions in a microwave-safe bowl.
- Stir until smooth and creamy.
Step 2: Dip the Oreos
- Place a piece of wax paper on a baking sheet.
- Dip each double-stuff oreo into the melted yellow candy melts until fully coated.
- Allow any excess coating to drip off before placing on the wax paper.
Step 3: Add Legs and Eyes
- Quickly insert two broken pieces of thin pretzel rods into each dipped oreo for legs.
- Place two mini chocolate chips on top for eyes before the candy coating sets.
Step 4: Create Beaks
- Use orange decorating gel or melted orange candy melts to create small beaks on each chick.
Step 5: Chill and Set
- Place your baking sheet in the refrigerator to allow the chicks to set completely.
Enjoy your delightful Oreo Easter Chicks as an unforgettable treat this holiday season!
How to Serve Oreo Easter Chicks
Oreo Easter Chicks make a delightful and fun addition to any Easter gathering. These colorful treats can be presented in various creative ways to enhance their appeal.
Festive Dessert Table
- Arrange the chicks on a vibrant cake stand for an eye-catching centerpiece.
- Use themed decorations like pastel-colored plates and napkins to complement the treats.
Easter Basket Treats
- Place Oreo Easter Chicks in small, decorative baskets as festive gifts.
- Add some grass-like filler for an authentic Easter basket look.
Kids’ Party Favors
- Package individual Oreo Easter Chicks in clear bags tied with colorful ribbons.
- This makes for a charming takeaway for children at parties or gatherings.
Springtime Picnics
- Serve these treats alongside other spring-themed snacks during outdoor picnics.
- Pair them with lemonade or fruit juices for a refreshing touch.
How to Perfect Oreo Easter Chicks
Creating the perfect Oreo Easter Chicks is all about attention to detail. Here are some tips to elevate your treat-making game:
- Choose Quality Candy Melts: Using high-quality yellow candy melts ensures better taste and a smoother finish when coating your Oreos.
- Use Fresh Ingredients: Make sure your Oreos and decorations are fresh for optimal flavor and appearance.
- Experiment with Colors: Feel free to use other colors of candy melts for different themed occasions or personal preferences.
- Work Quickly: Once you dip the Oreos, work fast to add pretzels and chocolate chips before the candy sets, ensuring they stick properly.
- Chill Before Serving: Refrigerate the finished chicks for at least 15 minutes to help them set completely before displaying or serving.
Best Side Dishes for Oreo Easter Chicks
When serving Oreo Easter Chicks, consider pairing them with complementary side dishes that enhance your dessert table. Here are some great options:
-
Fresh Fruit Salad
A mix of seasonal fruits adds a refreshing contrast to the sweetness of the chicks. -
Veggie Platter with Dip
Crisp vegetables served with hummus or ranch dressing provide a savory balance. -
Mini Sandwiches
Create bite-sized sandwiches using turkey or chicken salad for a hearty option that kids will love. -
Cheese and Crackers
A simple cheese platter with assorted crackers offers a delicious snack that pairs well with sweets. -
Popcorn Mix
Sweet and salty popcorn mixes can add an exciting crunch alongside your Oreo treats. -
Chocolate-Covered Pretzels
These provide a delightful contrast in texture and flavor, complementing the creamy Oreos nicely. -
Fruit Punch
A fruity drink can refresh guests while matching the festive theme of your gathering. -
Cupcakes
Decorated cupcakes can round out your dessert offerings and tie into the Easter theme beautifully.
Common Mistakes to Avoid
When making Oreo Easter Chicks, it’s easy to run into a few common pitfalls. Here are some mistakes to steer clear of:
- Not melting candy properly: Ensure you follow the package directions for melting yellow candy melts. If they are overheated, they can become lumpy and unusable.
- Skipping the wax paper: Placing Oreo cookies directly on a baking sheet can lead to sticking. Always use wax paper to make removal easier.
- Rushing the decorating process: Allow the melted candy to set slightly before adding pretzel legs and mini chocolate chip eyes. This prevents them from sinking into the coating.
- Using stale Oreos: Fresh Oreos will yield better results in terms of taste and texture. Check the expiration date before starting your recipe.
- Overloading with decorations: While it’s tempting to add too many embellishments, sticking to the basic design enhances their appearance and keeps them simple.
Storage & Reheating Instructions
Refrigerator Storage
- Store Oreo Easter Chicks in an airtight container.
- They can last up to 5 days in the refrigerator.
Freezing Oreo Easter Chicks
- Place them in a freezer-safe container or bag.
- They can be frozen for up to 3 months.
Reheating Oreo Easter Chicks
- Oven: Preheat to 350°F (175°C) and warm for about 5 minutes just until slightly soft.
- Microwave: Heat for 10-15 seconds on a microwave-safe plate for best results.
- Stovetop: Not recommended as it may ruin their shape and texture.
Frequently Asked Questions
Here are some common questions about making Oreo Easter Chicks:
How do I customize my Oreo Easter Chicks?
You can use different colored candy melts for various designs, or try adding sprinkles for added flair!
Are Oreo Easter Chicks suitable for kids?
Absolutely! They are fun and easy for kids to help make with adult supervision.
Can I make Oreo Easter Chicks ahead of time?
Yes! These treats store well, making them perfect for preparing in advance of any event.
What’s the best way to transport Oreo Easter Chicks?
Use a sturdy container lined with wax paper to keep them secure during transport.
Final Thoughts
Oreo Easter Chicks are not only delightful but also versatile. They make excellent treats for gatherings or festive occasions. Feel free to customize with different colors or decorations that suit your theme. Give this fun recipe a try, and enjoy creating these adorable snacks!
Oreo Easter Chicks

Oreo Easter Chicks are a whimsical and delightful treat to brighten up your holiday celebrations. These charming snacks combine the classic flavor of Oreos with vibrant yellow candy melts, creating an eye-catching dessert that is both fun to make and eat. Perfect for family gatherings, parties, or simply as a festive snack, these adorable chicks are easily customizable, allowing you to add your personal touch. With simple ingredients and an easy preparation process, even kids can join in on the fun! Make a batch of these delightful Oreo Easter Chicks and watch them disappear at your next gathering—everyone will love their cute appearance and delicious taste.
- Prep Time: 15 minutes
- Cook Time: 5 minutes
- Total Time: 20 minutes
- Yield: Makes approximately 36 Oreo Easter Chicks 1x
- Category: Dessert
- Method: No-Bake
- Cuisine: American
Ingredients
- 1–2 bags yellow candy melts
- 1 package double-stuff Oreos
- Mini chocolate chips
- Thin pretzel rods (broken into short pieces)
- Orange decorating gel or orange candy melts
Instructions
- Melt the yellow candy melts according to the package directions in a microwave-safe bowl until smooth.
- Dip each double-stuff Oreo into the melted candy, ensuring it's fully coated. Allow excess to drip off before placing it on wax paper.
- Quickly insert two broken pretzel pieces into each dipped Oreo for legs and place two mini chocolate chips on top for eyes before the coating sets.
- Use orange decorating gel or melted orange candy melts to create small beaks on each chick.
- Chill in the refrigerator until set completely.
Nutrition
- Serving Size: 1 chick (30g)
- Calories: 150
- Sugar: 12g
- Sodium: 50mg
- Fat: 7g
- Saturated Fat: 3g
- Unsaturated Fat: 4g
- Trans Fat: 0g
- Carbohydrates: 20g
- Fiber: 0g
- Protein: 1g
- Cholesterol: 0mg