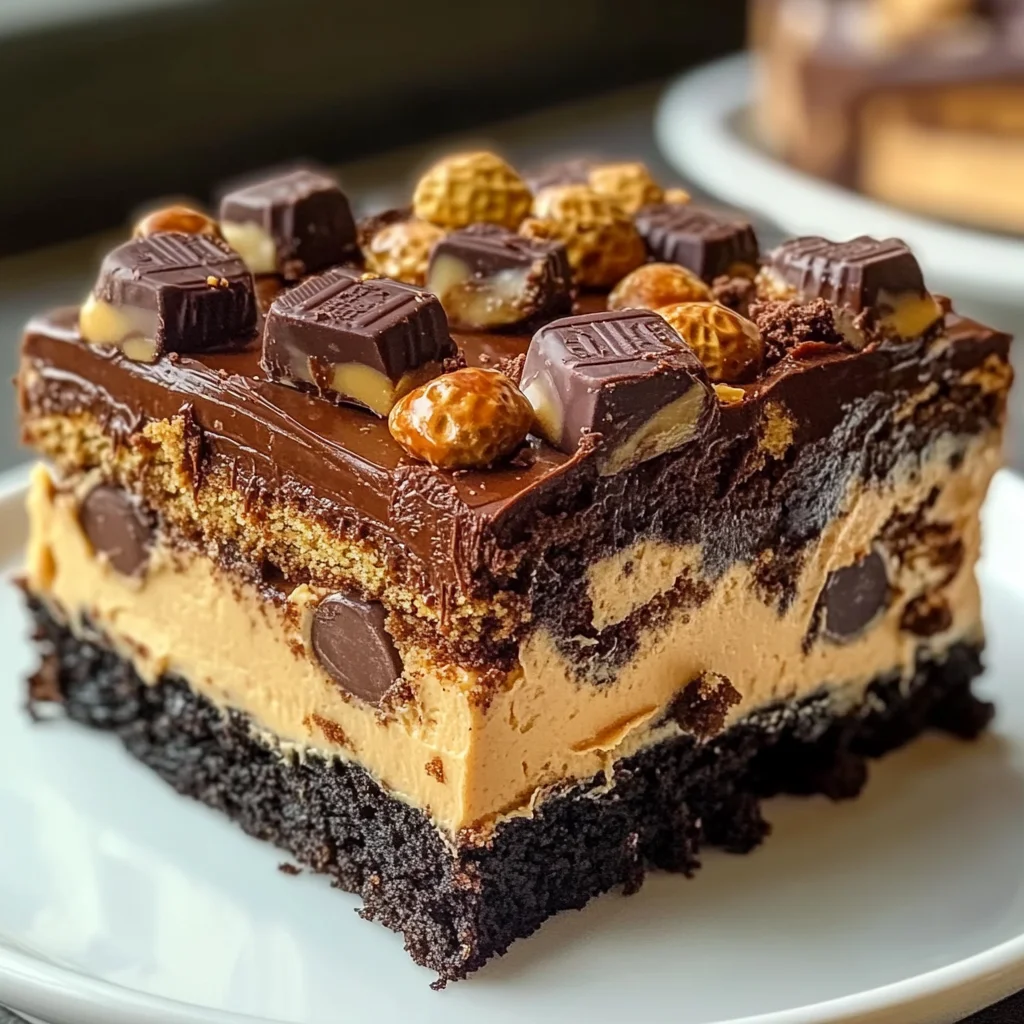
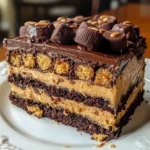
Reese’s Peanut Butter Earthquake Cake
A slice of Reese’s Peanut Butter Earthquake Cake is pure bliss! This decadent chocolate and peanut butter cake features a gooey, layered center that’s studded with Reese’s cups. Perfect for birthdays, parties, or any celebration, this indulgent dessert is sure to impress your guests. It’s easy to make and offers a delightful combination of flavors that everyone loves.
Why You’ll Love This Recipe
- Decadent Flavor: The rich chocolate combined with creamy peanut butter creates an irresistible taste sensation.
- Easy to Prepare: With simple steps and common ingredients, this cake can be whipped up in no time.
- Perfect for Any Occasion: Whether it’s a family gathering or a potluck, this cake will steal the show.
- Gooey Center: The unique layered texture makes every bite a delightful surprise.
- Kid-Friendly: Kids and adults alike will love the fun combination of chocolate and peanut butter.
Tools and Preparation
To make your baking experience seamless, gather the necessary tools before you start. Having everything ready will help you maintain the flow during preparation.
Essential Tools and Equipment
- Mixing bowls
- Electric mixer
- Baking dish (9×13-inch)
- Spatula
- Knife
Importance of Each Tool
- Mixing bowls: Essential for combining ingredients efficiently without mess.
- Electric mixer: Saves time and effort when blending the cake batter and creamy filling.
- Baking dish (9×13-inch): Provides the perfect size for an even bake and easy serving.

Ingredients
For the Cake
- 1 box chocolate cake mix
- 1 cup water
- 1/2 cup vegetable oil
- 3 large eggs
For the Peanut Butter Filling
- 1 cup creamy peanut butter
- 8 oz cream cheese, softened
- 1/2 cup unsalted butter, melted
- 4 cups powdered sugar
- 1 tsp vanilla extract
For Topping
- 1 cup Reese’s Peanut Butter Cups, chopped
How to Make Reese’s Peanut Butter Earthquake Cake
Step 1: Preheat the Oven
Preheat your oven to 350°F (175°C). Grease your 9×13-inch baking dish to ensure easy removal after baking.
Step 2: Prepare the Cake Batter
In a large bowl:
1. Mix together the chocolate cake mix, water, vegetable oil, and eggs until well combined.
2. Pour the batter into the prepared baking dish.
Step 3: Make the Peanut Butter Mixture
In a separate bowl:
1. Combine the creamy peanut butter, softened cream cheese, melted butter, powdered sugar, and vanilla extract.
2. Mix until smooth.
Step 4: Combine Layers
Drop spoonfuls of the peanut butter mixture over the cake batter:
– Use a knife to swirl it gently into the batter for that signature earthquake effect.
Step 5: Add Toppings
Sprinkle chopped Reese’s Peanut Butter Cups evenly over the top of your cake mixture.
Step 6: Bake
Bake in your preheated oven for 35-40 minutes:
– A toothpick inserted into the center should come out mostly clean when done.
Step 7: Cool and Serve
Allow your cake to cool slightly before serving. Enjoy it warm or at room temperature for a delicious treat!
How to Serve Reese’s Peanut Butter Earthquake Cake
Serving Reese’s Peanut Butter Earthquake Cake can elevate your dessert experience. This cake is not only a feast for the eyes but also a delightful combination of flavors that can be paired with various accompaniments.
A La Mode
- Serve warm slices topped with a scoop of vanilla ice cream for a creamy contrast to the rich cake.
Whipped Cream Topping
- Add a generous dollop of whipped cream on each slice to enhance its sweetness and creaminess.
Chocolate Sauce Drizzle
- Drizzle warm chocolate sauce over the cake for an extra layer of indulgence that pairs perfectly with the peanut butter flavor.
Fresh Fruit
- Serve alongside fresh strawberries or raspberries to add a refreshing balance to the rich chocolate and peanut butter.
Nuts Sprinkle
- Top with crushed peanuts or pecans for an added crunch that complements the soft texture of the cake.
How to Perfect Reese’s Peanut Butter Earthquake Cake
Perfecting your Reese’s Peanut Butter Earthquake Cake ensures it turns out delicious every time. Here are some helpful tips:
- Use Room Temperature Ingredients – Ensure eggs, cream cheese, and butter are at room temperature for better mixing and texture.
- Don’t Overmix Batter – Mix just until combined to keep the cake light and fluffy; overmixing can lead to a dense texture.
- Check Oven Temperature – Use an oven thermometer to confirm accurate baking temperatures, as this affects baking times.
- Let It Cool Completely – Allow the cake to cool in the pan for at least 10 minutes before transferring it to a wire rack to maintain its structure.
Best Side Dishes for Reese’s Peanut Butter Earthquake Cake
Pairing side dishes with your Reese’s Peanut Butter Earthquake Cake can enhance its flavor profile. Here are some delightful options:
- Vanilla Ice Cream – A classic pairing that adds creaminess and balances the richness of the cake.
- Fresh Berries – Strawberries or blueberries provide a tart contrast that complements the sweet flavors.
- Chocolate Chip Cookies – For extra chocolate goodness, serve with homemade cookies on the side.
- Peanut Butter Cookies – Enhance the peanut butter flavor by offering these chewy treats alongside.
- Fruit Salad – A light, refreshing option that cleanses the palate between bites of rich cake.
- Caramel Sauce – Drizzle caramel sauce for an added layer of sweetness that pairs beautifully with both chocolate and peanut butter.
Common Mistakes to Avoid
Making the perfect Reese’s Peanut Butter Earthquake Cake can be tricky. Here are some common mistakes to watch out for:
- Bold mixing: Overmixing the cake batter can lead to a dense texture. Mix just until combined for a lighter cake.
- Bold measuring: Incorrectly measuring ingredients, especially the powdered sugar, can affect consistency. Use a kitchen scale for accuracy.
- Bold cooling: Skipping the cooling step may result in a messy serving. Allow the cake to cool slightly before cutting.
- Bold ingredient temperature: Using cold eggs or cream cheese can lead to lumps in your batter. Ensure all ingredients are at room temperature.
- Bold baking time: Not checking for doneness could leave you with an undercooked center. Use a toothpick and check around the 35-minute mark.
Storage & Reheating Instructions
Refrigerator Storage
- Store the cake in an airtight container.
- It will keep well in the refrigerator for up to 5 days.
Freezing Reese’s Peanut Butter Earthquake Cake
- Wrap slices individually in plastic wrap and place them in a freezer-safe bag.
- The cake can be frozen for up to 3 months.
Reheating Reese’s Peanut Butter Earthquake Cake
- Bold Oven: Preheat to 350°F (175°C) and warm for about 10-15 minutes.
- Bold Microwave: Heat individual slices on medium power for 15-30 seconds, checking frequently.
- Bold Stovetop: Place a slice in a skillet over low heat, covering it to retain moisture, and heat for about 5 minutes.
Frequently Asked Questions
Here are some frequently asked questions about making this delicious dessert.
What is Reese’s Peanut Butter Earthquake Cake?
Reese’s Peanut Butter Earthquake Cake is a decadent dessert made of chocolate cake topped with creamy peanut butter filling and Reese’s cups.
How long does it take to make Reese’s Peanut Butter Earthquake Cake?
The total time required is approximately 60 minutes, including both preparation and baking times.
Can I use crunchy peanut butter instead of creamy?
Yes, you can use crunchy peanut butter if you prefer added texture in your Reese’s Peanut Butter Earthquake Cake.
How should I store leftovers of Reese’s Peanut Butter Earthquake Cake?
Store leftovers in an airtight container in the refrigerator for up to 5 days or freeze for up to 3 months.
Final Thoughts
Reese’s Peanut Butter Earthquake Cake is an indulgent treat that combines rich chocolate with creamy peanut butter flavors. This dessert is perfect for any occasion and can be customized by adding extra toppings like nuts or drizzling chocolate sauce. We encourage you to try this recipe and enjoy its delightful taste!
Reese’s Peanut Butter Earthquake Cake
Indulge in the irresistible delight of Reese’s Peanut Butter Earthquake Cake! This decadent dessert combines rich chocolate cake with a creamy peanut butter filling, creating a gooey layered center that’s sure to impress at any celebration. With chunks of peanut butter cups nestled throughout, each slice is a heavenly treat for chocolate and peanut butter lovers alike.
- Prep Time: 15 minutes
- Cook Time: 40 minutes
- Total Time: 55 minutes
- Yield: Approximately 12 servings 1x
- Category: Dessert
- Method: Baking
- Cuisine: American
Ingredients
- 1 box chocolate cake mix
- 1 cup water
- 1/2 cup vegetable oil
- 3 large eggs
- 1 cup creamy peanut butter
- 8 oz cream cheese, softened
- 1/2 cup unsalted butter, melted
- 4 cups powdered sugar
- 1 tsp vanilla extract
- 1 cup chopped peanut butter cups
Instructions
- Preheat your oven to 350°F (175°C) and grease a 9×13-inch baking dish.
- In a large bowl, combine the chocolate cake mix, water, vegetable oil, and eggs until smooth. Pour into the prepared baking dish.
- In another bowl, mix together the peanut butter, softened cream cheese, melted butter, powdered sugar, and vanilla extract until well blended.
- Drop spoonfuls of the peanut butter mixture over the batter and swirl gently with a knife.
- Sprinkle chopped peanut butter cups over the top.
- Bake for 35-40 minutes or until a toothpick inserted comes out mostly clean.
- Allow to cool slightly before serving warm or at room temperature.
Nutrition
- Serving Size: 1 serving
- Calories: 400
- Sugar: 38g
- Sodium: 300mg
- Fat: 20g
- Saturated Fat: 8g
- Unsaturated Fat: 11g
- Trans Fat: 0g
- Carbohydrates: 49g
- Fiber: 2g
- Protein: 6g
- Cholesterol: 45mg